
Affiliate links may be present in this article. We might receive a commission if you click and buy, at no extra cost to you. For additional information, please visit our disclosure policy.
One of the many questions that arise during home renovation projects is whether or not the caulking should be done before or after the painting. The solution to this question is not simple because it is dependent on whether or not the caulk line will be visible once the surface has been painted. If the caulk will be visible once the paint work is completed, it is advisable to apply it before painting as a general rule.
Caulk should be applied before painting. To clarify, caulk lines should be applied before painting if they are going to be visible around windows, doors, or baseboards. This step should be done before painting.
However, if the line of caulk will be hidden by trim or moulding, then it can be placed after the painting has been completed. When beginning a painting project, it is essential to determine whether caulk will be applied prior to or subsequent to the painting process.
Contents
- Why Caulking Important?
- What Problems Does Caulk Solve?
- What Problems Does Caulk Create?
- Cracking
- Crazing
- How to Solve Cracking Paint Over Caulk
- How to Choose the Right Caulk for Your Project
- How to Caulk Trim
- How to Caulk Baseboards
- How Long Does Caulk Take to Dry?
- How to Remove Old Caulk and Start Fresh?
- Exterior Caulking
- FAQs
Why Caulking Important?
Caulking is a vital task to complete if you want to properly maintain your house. This assists in closing holes and crevices that could otherwise let air and water in. When this is done, it is possible to minimize moisture damage to the floors and walls, as well as reduce the energy inefficiency that is caused by drafts.
In addition, it is possible to prevent pests from entering a home by leaving only a little entrance here and there. It is possible to accomplish this task with the help of a caulking gun and a tube of caulking, and the method is not overly complicated.
Because there are a variety of caulk formulas designed for specific tasks, it is essential to select the caulk that is appropriate for the job. Silicone caulk is mould-resistant and watertight, making it ideal for kitchens and bathrooms. For optimal results, follow the box instructions after choosing the right caulk. Caulk makes your house more comfortable and lasting.
What Problems Does Caulk Solve?
We’ve gone over how caulking can create a faultless finish; now let’s talk about the other things it can help you with. The following are some common applications for caulk in the decorating industry:
- Woodworking: after installing trim or skirting boards, you can find that there are some little gaps between the boards. The joints in the woodwork might give the appearance of being seamless if the caulk is applied to them.
- Sticking: you might use caulk as an alternative to nails in order to adhere two surfaces together.
- Tiles Using caulk is an efficient way to repair tiles in kitchens and bathrooms, avoiding mould growth and establishing a waterproof barrier at the same time. Caulk can be found in most hardware stores.
- Painting Cracks Caulk can also be used to cover small hairline cracks before painting, allowing for a surface that can be painted within a few hours. Caulk can be used to cover cracks before painting.
- To seal – Areas that are prone to moisture, such as windows, can be sealed with caulk to prevent moisture from entering the space between the window and the frame.
What Problems Does Caulk Create?
Caulk is a versatile and essential tool for home improvement projects, but it can also come with its own set of issues. Two of the most significant problems that can arise with caulk are cracking and crazing. Cracking can occur if the caulk is not flexible enough for the surface it is applied to, causing it to break apart over time.
On the other hand, crazing happens when paint that has been applied over the caulk begins to peel and flake, ruining the overall appearance of the caulking job. Understanding these potential issues and choosing the appropriate caulk for the job can save homeowners time, money, and frustration in the long run.
Cracking
Cracking caulk is a common problem in the UK, which may be annoying for professional decorators as well as people who enjoy doing their own decorating at home. Caulks can crack for a variety of reasons, such as when the incorrect type of caulk is used or when the caulk is not flexible enough when it is applied to a surface.
It is recommended that the flexibility of the caulk be taken into consideration before selecting the appropriate one for the surface in order to avoid this problem. It is essential to keep in mind that there is a variety of caulks available to choose from in order to guarantee that you are utilizing the correct caulk for the job at hand. Acrylic caulk is ideal for use on interior trim, such as skirting boards, because it can be painted over without presenting any challenges. Silicone caulk is best for sealing moisture-prone areas, so use that.
Crazing
Paint crazing has many causes. Painting over wet caulk is a common cause. Paint crazing is one of the most frustrating surface issues. The paint cracks and forms a spider web pattern. Painting over wet caulk is a common cause of paint crazing. This mistake could waste time and irritate you. Before painting, let the caulk set completely to avoid this irritating issue. Drying caulk may break the paint.
Caulk and paint may not be compatible. It can be difficult to find appropriate paints and caulks due to the wide variety available. Apply paint primer before painting over the caulk. This will prevent the problem from occurring. It is crucial to apply a thin coating of emulsion paint in order to prevent crazing. This is because a thick layer of paint will take longer to cure and may result in the accumulation of moisture, which can cause the paint to peel away from the surface.
How to Solve Cracking Paint Over Caulk
There are remedies to decorating difficulties such as cracked paint, but the specific treatment relies on the origin of the problem, such as whether it is due to wet caulk or an incompatibility between the paint and the caulk. In order to prevent paint from cracking or crazing on caulk, our specialists have some suggestions.
1. Do Not Over-Applying Caulk
Caulk should only be applied in a thin bead in order to avoid the issues that come from using too much.
2. Ensure You Give the Caulk the Greatest Possible Amount of Time to Dry
It is advised that the caulk be allowed to dry for the maximum amount of time feasible in order to prevent crazing from being caused by shrinking. It is best to leave it uncovered for the entire night. Alternatively, utilizing caulk that dries in a hurry could also be of assistance.
3. Check the Paint Manufacturer’s Data Sheets
Before beginning any kind of decorating endeavour, it is recommended that you look over the data sheet that comes with the paint you intend to use. The producers of paint provide helpful information to ensure that their product delivers the best possible results. Check with the manufacturer to see if there is a particular caulk that they recommend or if there are certain activities that they warn against.
4. Apply a Primer
Caulk can also be primed before being painted, which is another solution. If you are a professional decorator, on the other hand, using this strategy could increase your labour costs and make the decorating process take longer. You can use a general-purpose primer such as Zinsser BIN, which generates an adhesive coating for the paint to attach to while it is being applied and continues to adhere to it over time.
5. Check the Temperature
Before painting, ensure the room is over 80 degrees Celsius. Lower temperatures cause water-based paints to fracture.
How to Choose the Right Caulk for Your Project
When choosing caulk for your next project, consider the material, surface, and paint. Wood and concrete require different caulks. The two materials have very different characteristics. Choose a paint-compatible caulk if you plan to paint over it. Analyze the surface and materials before starting. This will narrow your choices and help you choose the right caulk.
How to Caulk Trim
Caulking prevents the paint from chipping and gives a smooth finish to any painting project. Hardware and home improvement stores sell caulk. Start caulking trim at the wall-trim joints. Then caulk trim gaps and cracks. Finally, caulk the trim perimeter. Caulk any trim joints so the paint job looks professional. Before drying, smooth the caulk with your finger or a putty knife. Simple steps will yield the desired effect.
How to Caulk Baseboards
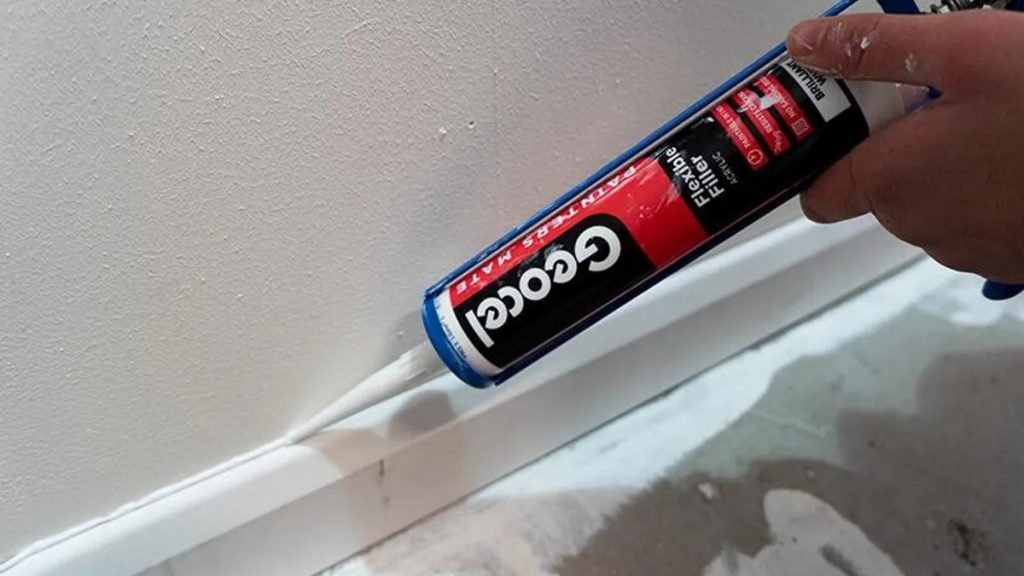
Caulk is an easy way to clean baseboards and seal drafts. Clean the caulk application area with soap and water. After that, cut the caulk tube tip at 45 degrees and shatter the inner seal with a nail or wire. For optimal results, use a caulk gun to apply the caulk evenly and continuously. Apply caulk to baseboards and smooth with a putty knife or finger. This lets you caulk baseboards professionally. Before painting or staining, let the caulk cure overnight. These simple steps will yield a professional result.
How Long Does Caulk Take to Dry?
The type of caulk, coating thickness, and atmosphere all affect caulk drying time. Most caulk can be touched within an hour without smudging, but it takes 12–24 hours to fully set. It may take longer if you apply it in a moist setting or cover a large area. A hairdryer or window can speed up the process. You can do either. Caulk usually takes an hour to dry.
Read also How Long Does Filler Take to Dry?
How to Remove Old Caulk and Start Fresh?
Your home’s caulk can look less desirable if it’s dry, brittle, and discoloured. Remove the old caulk before updating it. Steps to remove old caulk and start over:
- Score the caulk line with a utility knife or caulk remover. This improves caulk adhesion.
- Use a putty knife to carefully remove the old caulk. Start at one end and move along the line.
- Vacuum or wipe away debris after removing the old caulk.
- Apply fresh caulk according to the manufacturer’s instructions, then smooth it with your finger to seal.
These steps will seal surfaces to prevent water damage.
Exterior Caulking
Caulk is usually used indoors, but it can be useful outside. Silicone or polyurethane is used to make exterior caulk, which comes in many colours to complement surrounding materials. Caulking a house’s exterior is simple, but one must pay attention to the many details.
Caulking requires a clean, dry place. Apply caulk evenly with a putty knife or caulk gun. Before it dries, smooth the caulk with a damp finger or sponge. Caulking a house’s exterior is easy and can improve its appearance and weatherproof it.
FAQs
Is Caulk Waterproof?
Yes, that’s why bathrooms and kitchens should utilize silicone caulks. They are waterproof and can be used around tiles and baths. Acrylic Latex caulk is better for skirting boards since it can be painted. It is imperative that you verify the planned application of the caulk that you have selected.
Can You Sand Decorator’s Caulk?
Due to the caulk’s flexible nature, it is not advisable to sand it down as you would do with a filler. This would be done to smooth out any imperfections. Instead, it is recommended to use a finger that has been wet in order to smooth the caulk in order to produce the desired clean appearance. It is essential that the caulk not be put in an excessive amount so that it does not become difficult to remove off the surface after it has been applied.

